


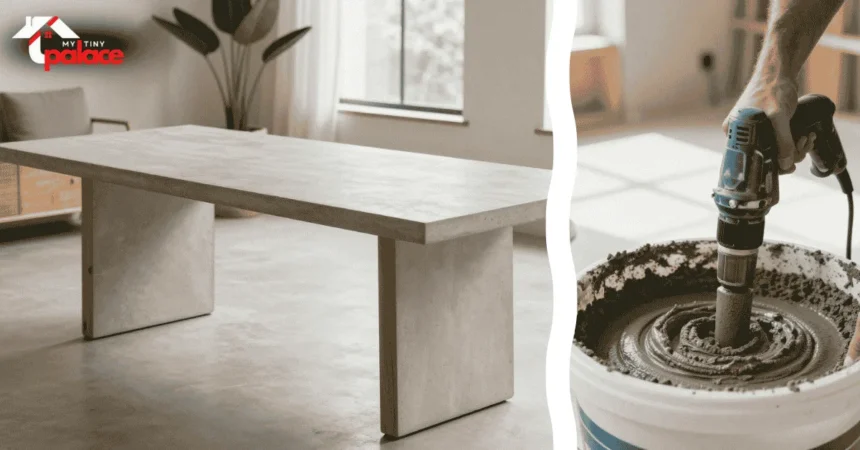
Creating a stylish centerpiece for your living space with a concrete finish doesn’t have to be expensive. You can make a custom DIY lightweight concrete table. It brings a sleek, industrial look to your home without the high cost.
- Planning Your DIY Lightweight Concrete Table Project
- Essential Tools and Materials for Success
- Constructing the Mold for Your Concrete Slab
- Mixing and Pouring the Lightweight Concrete
- Curing and Removing the Concrete from the Mold
- Sanding and Smoothing the Concrete Surface
- Applying the Final Sealer for a Durable Finish
- Conclusion
Building your own furniture with a concrete top lets you customize every detail. You can use advanced materials to make it easy to move and functional. This makes the project easier for beginners.
Many homeowners love a DIY concrete table as a modern decor focal point. This guide is for both seasoned makers and beginners. You’ll learn to create a durable, lightweight piece that shows off your style.
Begin your project today and see how easy it is to improve your interior design. With the right tools and patience, you’ll have a beautiful, custom table that lasts.


Planning Your DIY Lightweight Concrete Table Project
Creating a DIY lightweight concrete table needs careful planning. Think about your space and style. It’s important to consider how the table will fit in your home or garden.
Start by looking at Pinterest for ideas. Seeing different designs can help you choose the right shape and texture for your table. This can spark new ideas for your unique tabletop.


Measure your floor space to find the perfect width for your table. The table should look good in the room without taking up too much space. Getting the dimensions right is key to a functional and stylish table with a concrete finish.
Make a detailed sketch of your table before you buy materials. This helps you know exactly how much you need. A clear plan keeps your budget in check and makes building easier.
Think about where your table will go. Will it be in your dining room or on the patio? The table needs to handle different weather conditions. Planning well ensures your table stays strong and beautiful for a long time.
Essential Tools and Materials for Success
Building a lightweight concrete table needs specific materials from your local hardware store. You can find most items at Home Depot to start your affordable DIY project. Having everything ready saves time and avoids extra trips.
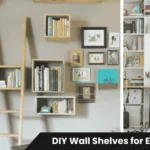
Related Articles

High-quality cement powder is key to a durable yet light table. Choose a sturdy mixing bucket that’s big enough for your mix. A reliable drill with a mixing attachment is also crucial for a smooth blend.
When working with dry materials, safety is paramount. Always wear a protective mask to avoid dust inhalation. Also, use durable gloves to protect your skin from irritation.
Take your time to stir the mix well until it’s just right. Proper preparation ensures your table is strong and ready for molding. These steps will help you get a professional finish on your custom piece.
Constructing the Mold for Your Concrete Slab
Creating a professional-looking DIY concrete table top starts with precision. The mold is like a negative space for your final piece. So, every measurement must be exact. When cutting the board for the base, make sure your lines are perfectly square. This avoids a distorted shape.
You’ll need wood, foam, and tile to build a strong frame. This frame supports the heavy wet mixture. Use a high-quality saw to miter the trim for clean, sharp corners. These edges are what define your concrete tabletop’s look, so take your time.
Once your pieces are ready, secure the plywood edges with strong wood glue and a sturdy clamp. This makes a leak-proof structure that keeps the slurry in during the pour, ensuring a solid concrete top. If you see any gaps, seal them well to stop the mixture from leaking out.
Adding extra support underneath the mold is crucial. It prevents the base from bowing under the concrete’s weight. Use a drill to fasten these supports. This keeps the entire frame rigid and stable while the concrete cures.
Mixing and Pouring the Lightweight Concrete
Now that your mold is ready, it’s time to mix the lightweight concrete. Getting the right consistency is key to a professional look. You can use a standard cement mix or self-leveling concrete. Stir the mixture in a large bucket until it’s smooth and pourable.
Make sure to stir well to avoid dry powder. If it’s too dry, add a bit of water or sand. Always wear a protective glove to keep your skin safe.
When ready to pour, start with a thin layer at the mold’s base. This layer prevents air bubbles. Then, pour the thicker main layer to fill the mold for your concrete top.
Pour the concrete slowly and steadily. This helps it spread evenly. Use a trowel or vibrating tool to settle the mixture in corners. With consistent technique, you’ll get a beautiful, durable piece for your home.
Curing and Removing the Concrete from the Mold
The transformation from a liquid to a solid slab occurs during curing. After pouring the concrete, let it set without disturbance. This patience is key to reaching the concrete’s maximum strength.
Keep the environment consistent to avoid cracking or weakness. If you used a thicker batch, it might take longer to dry. Don’t move the mold while it’s setting to keep the slab strong.
Once curing is complete, start removing the mold parts to reveal your concrete finish. Carefully remove the edges of the plywood, wood trim, and foam that shaped the slab. You might need a saw or a tool to cut the board if it was glued or clamped.
Check the underside of the slab after removing the sides. Look for rough edges or imperfections. Removing the mold shows your project’s raw form, ready for the final touches.
Handle the slab carefully during this stage. Even with self-leveling concrete, edges might be sharp or uneven. Taking your time ensures a professional finish.
Sanding and Smoothing the Concrete Surface
Turning a rough concrete piece into a smooth masterpiece starts with the right sanding technique. Using a trowel during your initial pour helps minimize surface imperfections. But this final smoothing process is what truly defines a professional-grade finish.
To begin, equip your orbital sander with coarse-grit sandpaper. This is to grind down any high spots or uneven areas. Move the sander in steady, overlapping motions across the entire surface. This initial layer of sanding removes the bulk of the rough texture left behind by the mold.
As you progress, switch to a finer grit sandpaper to refine the texture. It is vital to remove excess dust frequently so you can clearly see your progress. Pay close attention to every corner and edge, as these areas often require more focus to achieve a uniform look.
For the final pass, use 220-grit sandpaper to polish the surface until it feels soft to the touch. Work lightly to ensure you do not remove too much material or create a thin layer that exposes the aggregate underneath. Once every particle of dust is wiped away, your concrete surface will be perfectly prepared for the final sealing stage.
Applying the Final Sealer for a Durable Finish
Protecting your new concrete tabletop with a gloss finish is key. You need a top-notch sealer for lasting protection. This step keeps stains away and guards against daily wear.
Make sure the concrete is dust-free before applying the sealer. Any leftover dust can ruin the bond.
If there are still rough spots, use 220-grit sandpaper for a smooth finish. Clean the area with a damp towel to get rid of dust. A clean surface is crucial for the sealer to stick well.
Apply the sealer with a clean terry cloth or a professional pad. Use thin, even coats to avoid streaks. Let each coat dry fully before adding the next.
After the final coat dries, buff the surface for your preferred finish. Whether you want a glossy or matte look, buffing adds a professional touch. This durable layer keeps your hard work safe, letting the concrete’s beauty shine for years.
Conclusion
Building your own lightweight concrete table turns a simple idea into something amazing. It shows that you don’t need to spend a lot to have high-end furniture. Now, you have a strong piece with a concrete top that shows off your dedication.
Your new table is perfect for any room or outdoor area. Mixing and casting let you make it exactly how you want. You can find lots of ideas on Pinterest to decorate your space.
Don’t forget to seal your table well with a gloss finish to keep it looking good. A good sealer with a gloss finish makes it smooth and protects it from stains and water. This way, your hard work will stay beautiful for a long time with a durable concrete finish.
Share your table with others to inspire them and provide DIY inspiration. Your story shows that anyone can do this. Enjoy the pride of using furniture you made yourself.