


Do you dream of turning your living space into a chic Parisian sanctuary with a stylish board and batten design? Getting a high-end look in a temporary space seems hard. But you can easily boost your home decor without breaking your lease.
- Why Choose Removable Box Molding for Rentals
- Essential Tools and Materials for Your Parisian Wall Project
- Planning Your Layout and Measuring the Wall
- Preparing the Surface for Adhesive Molding
- Installing Removable Box Molding for Rentals
- Finishing Touches and Painting Your Trim
- Maintaining and Removing Your Wall Molding
- Conclusion
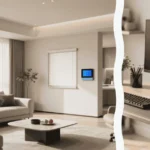
Using smart design tricks, you can add architectural charm that looks like classic European style. This trend is big on Pinterest. It’s a simple way to make your interior look luxe and timeless.
Putting up temporary wall moulding lets you change your space easily. It makes a beautiful background for your furniture and keeps the surface safe. Whether you want to spice up a plain wall or add depth, this method gives a pro look. Find out how this simple decor change can make your apartment stylish.
Why Choose Removable Box Molding for Rentals
Creating a sophisticated look in a rental property is smart and non-permanent. Many tenants worry about losing their security deposit when making changes. Luckily, removable box molding for rentals lets you get a high-end, Parisian look without harming the walls.
This method is perfect for renters who want architectural flair. You can pick lightweight materials and special adhesives to change a room. This friendly wall way makes sure your design is temporary and easy to remove.
This technique is very flexible, especially when using self-adhering materials. You get the look of permanent woodwork, but can move out when your lease ends. Since it’s important to maintain a clean look, consider using self-adhering materials. removable, you don’t have to worry about damaging the landlord’s property.
Choosing renter-friendly wall molding is a smart way to show your style. It mixes luxury design with the limits of apartment living. With careful planning, you can have a beautiful, vintage-style board and batten finish. renter-friendly home that feels like your own.
Essential Tools and Materials for Your Parisian Wall Project
Transforming your walls needs the right supplies for easy installation. Getting the correct tools is key to a DIY project that looks professional. Whether you pick a complete wall molding set or individual pieces, being prepared saves time and stress.
There are many options for your project, from traditional real wood to modern alternatives. Pre-cut wall molding is popular because it’s easy to use. Vinyl or foam-based options are also great for a quick update, especially for renters.

Peel-and-stick wall molding is perfect for the simplest process. These strips stick to your wall without nails or heavy glue. While wooden trim is classic, peel-and-stick offers a modern look that’s easy to remove.
Think about your room’s environment when choosing materials. In bathrooms or kitchens, choose waterproof options to avoid moisture damage. Vinyl tile stickers or specialized peel-and-stick wallpaper can also enhance your wall trim molding. The right kit ensures a durable and beautiful result that boosts your home decor.
Planning Your Layout and Measuring the Wall
Getting your wall frames right means they should line up perfectly from top to bottom. Before starting your DIY project, measure your wall carefully. This will help you achieve a professional look in your living room.
First, measure the wall’s width and height where you’ll put your molding. Use a laser level to mark the center. This keeps your design symmetrical. Don’t forget to consider any baseboard trim or chair rail you already have.
After measuring, use painter’s tape to draw your design on the wall. This trick lets you see how each frame or panel will fit before you install it. You can adjust the spacing to make sure the gaps are even.
Double-check your corners to make sure everything is square and level. If you’re adding beadboard or more paneling, make sure they match your main design. Spending time on this step avoids mistakes and makes your wall look like it belongs in a Parisian apartment, particularly with easy install options.
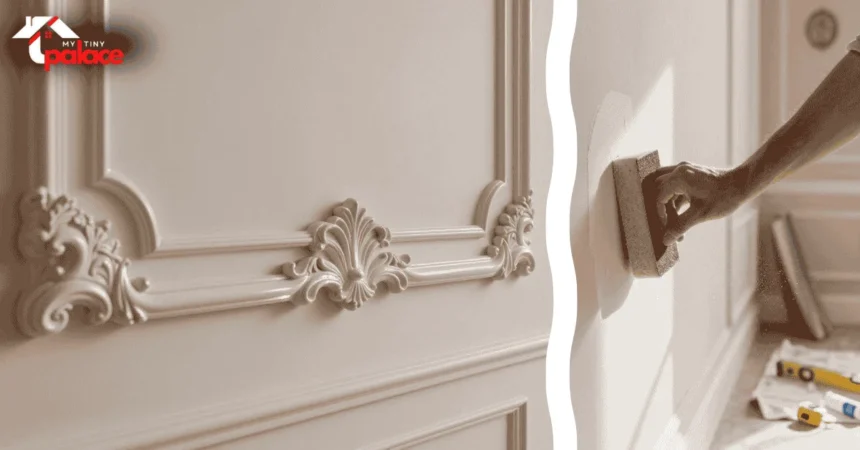
Preparing the Surface for Adhesive Molding
A clean and smooth wall is key to a professional look. Before installing molding peel and stick, make sure the surface is dust-free and has no grease or debris.
Begin by cleaning your walls with a mild soap and water. This step is crucial for a strong bond. Always dry the wall completely before applying adhesive.
For self-adhesive trim, the wall texture is important. A smooth surface is best for a strong grip. Avoid textured walls to prevent a weak bond.
Test a small area first to check if the adhesive won’t damage your paint. This is crucial, especially with wallpaper and other adhesive wall applications. You need to make sure the bond is strong and won’t pull off the paint when removed.
Many trims are waterproof and made from vinyl, like tile stickers. These need a clean base to stay in place, especially when using vintage board and batten styles. Moisture can cause the adhesive to fail early.
For extra security, use 3m strips or double-sided tape. Apply tape carefully to the back of the trim for a lasting hold. Use painter’s tape to mark lines without leaving residue.
Installing Removable Box Molding for Rentals
Transforming your space is simple with a pre-cut wall molding kit. Lay out your wooden pieces on the floor first. This helps you see how your design will look before attaching it to the wall.
To mount your wall panel pieces, apply double-sided mounting tape to the back of each strip. Many DIY fans like 3M products for their strong hold and easy removal. Press each piece firmly against the wall, making sure it’s straight with a level. This method is great for renters because it doesn’t damage the wall.
Use flexible corner pieces for corners to get a smooth look. These strips are easy to cut and attach, helping you handle wall irregularities. After placing your wainscoting panels, check that each frame is secure and straight to ensure an easy install.
If you want more stability, consider using a tiny nail in your kit. But only do this if your rental agreement allows minor wall repairs. A small nail adds extra security, especially in busy areas of your home. With your molding securely in place, you’re ready for the final painting step to enhance the look of your DIY wall.
Finishing Touches and Painting Your Trim
After you’ve installed everything, the finishing touches make your trim look elegant. To get that Parisian apartment vibe, fill in the small gaps where the molding meets the wall. Use a thin bead of paintable caulk to make it look like it’s part of the wall, enhancing your DIY wall project.
Once the caulk is dry, it’s time to paint the trim. Choose a high-quality paintable white to match your baseboard or chair rail. This uniform color makes your wall look like it was designed that way.
When painting, use a small, angled brush for clean lines near the ceiling and corners. This detail makes your trim look like it’s always been there. By focusing on these details, your project will look polished and sophisticated.
Maintaining and Removing Your Wall Molding
Removing your wall molding should be easy when you move. Opt for a self-adhering adhesive wall treatment to simplify your renovation process. removable design to keep your apartment renter-friendly. Just dust the trim with a soft cloth to keep it clean.
If you used adhesive strips, you can mount them again without harming the paint. This makes your walls friendly and respects your lease. Always follow the adhesive’s instructions for a clean removal.
To remove the trim, use a thin putty knife to break the bond. If you used caulk for a smooth edge, score it with a utility knife first. This helps avoid paint peeling when removing the molding.
If you nailed the molding for extra hold, fill the holes before moving. Use a light spackle, then sand and paint to match the original wall.
Conclusion
Your journey to a sophisticated Parisian apartment look is now complete. You know how to make plain rental walls stunning with simple, removable materials like adhesive wall decor.
This project shows that you don’t need permanent changes or expensive renovations for high-end wall decor. You can find new ideas for your home on Pinterest to keep it looking modern.
The beauty of decorative wall trim is its flexibility. You can pick a classic white finish for a clean look or a bold color to make your space pop. Just paint it with your favorite color to match your style.
Be proud of the professional look you’ve achieved with your picture frame accents. Your living space now shows off your personal taste and is still renter-friendly. Share your makeover with friends or post it online to inspire others.