


Quick summary
Small kitchens don’t need to feel cramped. These storage hacks clear your counters, speed up cooking, and make the most of every inch. Whether you’re renting or own, you’ll find budget-friendly solutions you can set up this weekend.
- Quick summary
- What are the Best Storage Hacks for Small Kitchens?
- Why smart storage matters in small kitchens
- Space-saving storage solutions (the core solution)
- How to choose the right storage hack for your kitchen
- Step-by-step: install and use the top 3 high-impact hacks
- Costs, time, and tools—compact table and notes
- Pros and cons—who should try these hacks
- Quick starter plan—what to do this weekend
- Quick summary and next steps
What are the Best Storage Hacks for Small Kitchens?
A storage hack is a practical, usually inexpensive solution that saves space and improves access. Small kitchen storage hacks include vertical wall solutions, inside-cabinet organizers, pull-out shelves, and space-saving gadgets. Some are permanent (drilling into walls), but most are renter-friendly (adhesive strips, tension rods, over-the-door racks). The goal isn’t a showroom kitchen—it’s a functional one where you find what you need without digging, and counters stay clear for food prep.
Why smart storage matters in small kitchens
Clutter steals speed. When pots are buried in a cabinet, you waste time hunting for the right one. When your counters are packed, you lose prep space. When drawers overflow, finding a utensil becomes frustrating. Smart storage fixes all three. You work faster, your kitchen feels bigger, and you’re safer when knives and hot pans have proper homes.
Beyond function, a clear kitchen reduces stress. Mental clutter follows physical clutter. When everything has a place and surfaces stay open, you breathe easier. Cooking becomes enjoyable instead of annoying. Friends feel comfortable visiting. That’s the real payoff: a kitchen that works for you.
Related Articles

For a broader perspective on optimizing your entire kitchen layout, explore our Kitchen Design Ideas for Small Spaces guide, which pairs these storage solutions with smart design principles.
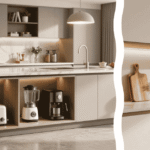
Space-saving storage solutions (the core solution)
Vertical storage uses walls instead of taking up floor space. Pegboards, magnetic strips, and wall-mounted rails hold utensils, spice jars, and tools at eye level. Inside-cabinet organizers include stackable shelves, tiered risers, and drawer dividers that transform dead space into usable shelves. Pull-out shelves and baskets slide out like drawers, making items at the back of deep cabinets actually reachable. Lazy Susans rotate in corner cabinets so you don’t lose items in the back. Rolling carts tuck into narrow gaps and move wherever you need them. Multi-use furniture, like a kitchen cart, combines storage, counter space, and mobility.

Each solution targets a different problem. No wall space? Use inside-cabinet organizers. Corner cabinet chaos? Add a lazy Susan. Need extra counter space? Pull in a rolling cart. Deep drawers overflowing? Use dividers and stackable containers.
How to choose the right storage hack for your kitchen
Start by measuring. How much wall space is available? Are you renting or owning? How deep are your cabinets? What do you cook most—do you need more own storage or spice storage? If you’re a renter, skip permanent solutions like drilling. If you cook daily, prioritize easy access over pretty displays. If you have a tiny galley kitchen, vertical wall storage is non-negotiable. If you have an L-shaped kitchen with corner cabinets, lazy Susans solve access problems.
A simple rule: no wall space → inside-cabinet solutions. Wall space available → vertical pegboard or rails. Corner cabinet chaos → lazy Susan. Limited counter space → rolling cart. Deep drawers → dividers and risers. Match your constraint to your solution, and you’ll succeed.
Budget matters too. Adhesive hooks cost $5. A small pegboard kit runs $20–$40. A pull-out shelf organizer costs $15–$30. A quality lazy Susan is $20–$50. A rolling cart ranges $60–$150. Start with one low-cost hack and add others over time.
Related Articles

If you’re not sure which items are essential to store or which cooking tools you actually need, check our Kitchen Essentials Checklist to prioritize what deserves prime storage space.
Step-by-step: install and use the top 3 high-impact hacks

Hack 1: Vertical Wall Rail or Pegboard for Utensthe ils
Measure the wall space above your counter or beside your stove. Mark studs using a stud finder if drilling permanently, or use adhesive strips for renters. A wall rail (metal or wood) holds hooks that suspend utensils, pot lids, or small towels. A pegboard (wood or metal) accepts pegs for custom layouts. Attach the rail or pegboard, add hooks, and arrange frequently used items at eye level. This single change frees drawer space and makes cooking faster. Installation takes 30–60 minutes, including tool setup.
Hack 2: Inside-Cabinet Vertical Organizer for Pots, Pans, and Lids
Open a deep cabinet and measure the interior height and width. A vertical divider (like a wire shelf divider or tiered riser) lets you stack pots and pans upright so you see all lids without moving anything. Stackable shelf risers add another layer of storage, doubling capacity. Arrange heavy items low, lighter items higher. Lid storage is crucial—a tension rod or magnetic strip inside the cabinet door holds lids flat so they don’t avalanche when you open the door. Setup takes 15–20 minutes with no tools needed.
Hack 3: Pull-Out Shelf or Sliding Basket
Measure your cabinet depth. A pull-out shelf or sliding basket attaches to existing cabinet shelves and rolls out like a drawer. This brings items at the back within reach without contorting. Common depths are 18 inches and 24 inches. Installation involves sliding brackets under the shelf and securing with adhesive or small screws (check your cabinet for mounting holes first). These work especially well for pots, baking supplies, or pantry items. Setup takes 20–30 minutes.
Quick installation checklist (materials & safety)
- Measure twice before buying or drilling.
- Use a stud finder for permanent wall mounts; mark studs with a pencil.
- Gather tools: drill, level, measuring tape, pencil, wand all anchors (for drywall).
- For renters: use adhesive strips rated for yan item’s weight, or command hooks.
- Always use mounting hardware appropriate for your wall type (drywall, plaster, tile).
- If drilling near electrical outlets or pipes, use a stud finder to detect them first.
Renter-friendly alternatives (no-drill methods)
Over-the-door organizers hang from cabinet or pantry doors without drilling. Tension rods fit between cabinet walls to create dividers. Adhesive hooks, command strips, and magnetic strips require no drilling. Stackable bins and rolling carts need only floor space. Tiered shelf risers use existing shelves without modification. These alternatives cost 20–40% less and take 5–15 minutes to set up. Renters should default to these unless the lease explicitly allows drilling.
Costs, time, and tools—compact table and notes
Most storage hacks cost under $100 and take a weekend afternoon. Initial investment pays off in daily time saved and frustration avoided. A $30 pegboard saves you 5 minutes every time you cook—that’s hours per year. A $20 lazy Susan ends cabinet rummaging. Starting small and adding hacks over time spreads cost and keeps your kitchen from feeling overorganized.
| Storage Hack | Typical Cost | Time to Install | Best For |
|---|---|---|---|
| Adhesive hooks (set of 3–5) | $8–$15 | 5 minutes | Renters, light items |
| Pegboard kit (small) | $25–$50 | 30 minutes | Utensils, wall display |
| Wall-mounted rail | $30–$60 | 45 minutes | Frequently used items |
| Inside-cabinet divider | $15–$30 | 10 minutes | Pot and pan storage |
| Magnetic spice rack | $12–$25 | 5 minutes | Spices, small tools |
| Pull-out shelf organizer | $20–$40 | 20 minutes | Deep cabinet access |
| Lazy Susan (quality) | $25–$50 | 0 minutes | Corner cabinets |
| Rolling utility cart | $60–$150 | 0 minutes | Extra counter space |
| Stackable shelf risers (set) | $15–$30 | 5 minutes | Vertical cabinet space |
| Tension rod (inside cabinet) | $5–$12 | 10 minutes | Lid storage, dividers |
Pros and cons—who should try these hacks
Pros: Storage hacks are affordable, require minimal tools, and work in any kitchen regardless of size. Most are non-permanent, so renters can use them without losing deposits. They improve daily function and reduce stress. You’ll find things faster and spend less time organizing.
Cons: Some solutions require drilling, which renters may not be able to do. Space-saving comes with trade-offs—wall displays take visual real estate, and compact storage requires discipline (items must go back in their spots). Initial setup takes time, though long-term payoff is high. A few hacks won’t solve a fundamentally overstuffed kitchen—you may need to declutter first.
These hacks suit apartment renters, busy home cooks, small-space owners, and anyone tired of counter clutter. They’re most effective when combined—one hack helps, but three or four transform the entire kitchen’s efficiency and feel.
Quick starter plan—what to do this weekend
Pick one zone (above the stove, a deep cabinet, or a corner). Measure it carefully. Choose one hack from the cost table above that addresses your biggest pain point—whether that’s finding pots, storing spices, or freeing counter space. Buy the supplies (most run under $40). Install on Saturday afternoon. Live with it for a week and notice how much easier cooking becomes. Once you’re convinced, add a second hack to another zone. This three-step approach builds momentum without overwhelming you.
Start small. Start cheap. Start now. One simple hack this weekend creates a domino effect of better organization and a kitchen that actually works for you.
Quick summary and next steps
Free your counter one hack at a time. Measure your space, pick your biggest frustration, and buy one solution this week. Most storage hacks cost under $50 and take an afternoon. Renters, stick to adhesive and tension options. Homeowners, don’t shy away from permanent solutions if they serve your workflow.
Your next move: look at your kitchen right now. What frustrates you most? Is it finding pots? Storing spices? Freeing counter space? Pick that problem, measure the space where the solution would live, and order one hack today. Install it this weekend. Share your results with a friend. That’s how small kitchens become functional ones.