


Most homeowners think boosting property value means spending thousands on renovations. The truth? Small, strategic updates under $300 can make your space feel newer, brighter, and more valuable—without draining your savings account.
- Quick summary
- What are Low-Cost DIY Upgrades That Add Value to Your Home?
- Why it matters for homeowners (and renters)
- High-impact low-cost upgrades (what actually works)
- How to choose the right upgrade for your place
- Step-by-step: install and finish (one typical project as an example)
- Costs, time, tools — compact comparison table
- Pros & cons — who should consider these upgrades
- Quick summary + clear CTA (what to do next)
Quick summary
You don’t need a contractor or a massive budget to improve your home’s appeal. Simple projects like fresh paint, updated hardware, and better lighting can increase resale value and make your space more enjoyable right now. These upgrades work for homeowners preparing to sell and renters who want a nicer living space without losing their deposit.
What are Low-Cost DIY Upgrades That Add Value to Your Home?
Low-cost DIY upgrades are small-scale improvements that enhance your home’s appearance, function, or buyer appeal without requiring professional help or big spending. These projects typically fall into three budget ranges: under $50 for quick fixes like hardware swaps, $50–$300 for paint and lighting updates, and $300–$800 for slightly larger refreshes like backsplash installation or door replacement.
The key difference between low-cost upgrades and full renovations is scale. You’re not tearing out walls or replacing entire systems. Instead, you’re refreshing what’s already there—making existing features look intentional, clean, and well-maintained. For renters, these upgrades lean toward removable or reversible changes that won’t trigger lease violations. Homeowners have more flexibility to make permanent improvements that directly boost resale value. Both groups benefit from better curb appeal and a space that feels cared for.
Why it matters for homeowners (and renters)
First impressions shape buyer decisions fast. Research shows potential buyers form opinions about a home within eight seconds of walking through the door. Simple upgrades like modern light fixtures, fresh cabinet hardware, and neutral wall colors create that immediate “move-in ready” feeling that speeds up sales and often leads to higher offers.
Beyond resale value, these projects improve your daily comfort. A bright, updated kitchen makes cooking more pleasant. New door hardware that actually works smoothly eliminates small frustrations. Clean grout and fresh caulk make bathrooms feel sanitary and spa-like instead of dingy. You’re essentially staging your own home—creating a space that looks intentional rather than neglected.

Renters gain benefits too, though the value shows up differently. A refreshed apartment feels more like home and photographs better for social media. Peel-and-stick upgrades like removable wallpaper or backsplash tiles let you personalize your space without risking your security deposit. When you move out, most of these changes peel away cleanly. Some landlords even appreciate minor improvements that make their property more rentable, though always check your lease before starting any project.
The psychological impact matters just as much as the financial return. Walking into a space with cohesive finishes and good lighting genuinely improves your mood. You feel proud showing your home to guests. That daily satisfaction often outweighs the modest monetary investment, especially for projects that cost less than a weekend getaway.
High-impact low-cost upgrades (what actually works)
Curb appeal fixes deliver the strongest value for minimal cost. Power washing your front walkway, painting your front door a bold color, and adding symmetrical planters create an inviting entrance that signals “this home is maintained.” These projects cost under $150 combined and take a single afternoon.
Lighting upgrades transform rooms instantly. Replacing builder-grade fixtures with modern alternatives—think brushed nickel instead of brass, or sleek flush-mounts instead of outdated chandeliers—changes the entire feel of a space. LED bulbs add brightness while cutting energy costs. Dimmer switches give you control over ambiance. Most lighting swaps require only a screwdriver and basic electrical safety (turn off the circuit breaker first).
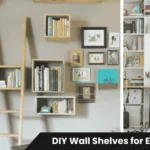
Related Articles

Kitchen and bathroom refreshes don’t require gut renovations. Painting cabinet doors, replacing worn hardware, and adding a peel-and-stick backsplash modernize these high-traffic spaces without the mess of full remodels. A new faucet or updated cabinet pulls can make a 15-year-old kitchen look current. These changes signal to buyers that the home has been updated recently, even if the underlying bones are older.
Storage improvements add functional value. Installing closet organizers, adding floating shelves in dead wall space, or mounting hooks near entryways solves real problems while making rooms feel more spacious. Buyers and renters both notice thoughtful storage solutions—they reduce clutter and make small spaces feel manageable.
Hardware and fixture updates create a surprising visual impact for tiny budgets. Swapping doorknobs, cabinet pulls, outlet covers, and towel bars throughout your home creates design cohesion. When all the hardware matches—say, all brushed nickel or matte black—your space looks intentionally designed rather than assembled randomly over the years. A full-house hardware refresh typically costs $100–$200.
Paint remains the single highest-return low-cost upgrade. Neutral walls in soft grays, warm whites, or gentle beiges appeal to the widest audience and make rooms feel larger and cleaner. One gallon covers about 400 square feet, so a typical bedroom needs just one or two gallons. Satin or eggshell finishes hide minor wall imperfections better than flat paint while staying easy to wipe clean.
How to choose the right upgrade for your place
Start by assessing your biggest pain point. Walk through your home as if you’re seeing it for the first time. What immediately catches your eye in a bad way? Scuffed walls? Dated light fixtures? Broken cabinet hinges? That’s your starting point—fix the thing that bothers you most because it’ll bother buyers too.
Budget determines your project scope. With $100, focus on paint or hardware. With $300, add lighting updates or a small backsplash. With $800, you can tackle paint plus lighting, plus new cabinet doors in one room. Resist the urge to spread money thin across too many half-finished projects. Completing one room fully delivers more visual impact than starting five rooms and finishing none.
Your timeline matters too. Some upgrades take a weekend; others need multiple days for drying time or curing. Painting cabinets requires several days because primer and paint need proper drying time between coats. Swapping hardware takes two hours. Choose projects that fit your available time and patience level.
Consider your home type and target audience. In a rental apartment, stick to removable upgrades and focus on personal comfort over resale value. In a suburban family home, prioritize kitchen and bathroom updates that appeal to buyers with kids. In a downtown condo, modern lighting and sleek finishes attract young professionals. Local market trends matter—check what similar homes in your neighborhood offer, then match or slightly exceed that baseline.
For renters, always review your lease first. Most landlords allow painting if you return walls to their original colors before moving out, but some prohibit it entirely. Removable updates like peel-and-stick products keep you compliant. Document your upgrades with photos in case any disputes arise later.
A simple prioritization rule: start with paint, then lighting, then hardware, then tackle functional fixes. This sequence gives you quick visual wins before moving into slightly more complex projects. You’ll gain confidence with each completed task, making bigger projects feel less intimidating.

Step-by-step: install and finish (one typical project as an example)
Let’s walk through a cabinet refresh—painting cabinet doors and replacing hardware. This project costs $150–$250 and dramatically updates your kitchen or bathroom for about $15 per door.
Quick materials & tools checklist
Materials: Deglosser or TSP cleaner ($8), primer designed for cabinets ($25), satin-finish cabinet paint in your chosen color ($30–$40 per quart), new cabinet pulls or knobs ($3–$8 each), wood filler if needed ($6), painter’s tape ($5), drop cloths ($10).
Tools: Screwdriver set, sandpaper or sanding block (120-grit and 220-grit), paintbrushes or foam rollers (2-inch angled brush works best), clean rags, drill with bits (if new hardware requires different hole spacing).
Budget roughly $200 total for a typical 10-door kitchen.
Quick step sequence
Step 1: Prep and clean. Remove all cabinet doors and hardware. Label each door’s location with painter’s tape so you know where everything goes back. Clean every surface with deglosser to remove grease and grime—kitchens especially collect invisible cooking oils that prevent paint adhesion. Let dry completely.
Step 2: Sand and prime. Lightly sand all surfaces with 120-grit sandpaper to rough up the existing finish—this helps primer stick. Wipe away dust with a damp rag. Apply thin, even coats of primer using a foam roller or brush. Let dry overnight. Sand lightly again with 220-grit sandpaper for smoothness.
Step 3: Paint. Apply your first coat of cabinet paint in thin, even strokes. Thick coats drip and show brush marks. Let dry according to can instructions (usually 4–6 hours). Apply a second coat. For high-traffic cabinets, a third coat ensures durability. Let cure for 48 hours before rehanging—this prevents fingerprints and ensures proper hardening.
Step 4: Install new hardware. Measure placement carefully—hardware mounted off-center looks sloppy even if everything else is perfect. If your new pulls require different hole spacing than the old ones, fill old holes with wood filler, let dry, sand smooth, and touch up paint before drilling new holes. Install hardware firmly, but don’t overtighten—you can crack painted finishes.
Step 5: Rehang and clean. Reattach doors using your labels as guides. Adjust hinges if doors don’t align perfectly. Clean any fingerprints or paint smudges with a damp microfiber cloth. Stand back and enjoy your updated space.
Safety checkpoint: If any cabinet doors are near electrical outlets or under-sink plumbing, work carefully around those areas. Never drill into walls without checking for wiring or pipes behind the surface—use a stud finder with wire detection if you’re adding new holes.
Costs, time, tools — compact comparison table
| Project | Cost Range | Time Needed | Difficulty |
|---|---|---|---|
| Paint one room | $40–$80 | 4–6 hours | Easy |
| Replace cabinet hardware | $50–$150 | 2–3 hours | Easy |
| Swap light fixtures | $30–$120 per fixture | 1–2 hours each | Moderate |
| Install peel-and-stick backsplash | $80–$200 | 3–5 hours | Easy |
| Paint cabinet doors | $150–$250 | 2–3 days (drying time) | Moderate |
Budget tips: Buy paint and supplies at discount retailers or during sale seasons. Many tool libraries and hardware stores rent tools by the day—no need to buy a power sander you’ll use once. Always purchase one extra row of peel-and-stick tile or one extra cabinet pull in case of mistakes or future repairs.
Check clearance aisles for discontinued light fixtures and cabinet hardware that still look modern—you can often find $60 fixtures marked down to $20. Reuse old hardware if it’s solid brass or quality metal; sometimes a good cleaning and fresh paint restore them perfectly.
Pros & cons — who should consider these upgrades
Low-cost upgrades make sense when you’re preparing to sell and need to compete with updated homes in your price range. They’re also smart for anyone who’s been in their home for a few years and wants a refresh without the chaos of major construction. Renters benefit from the improved daily experience and better apartment photos.
Skip DIY upgrades if your home has underlying issues that need professional attention first. Painting over water-damaged drywall or updating light fixtures in a room with faulty wiring wastes money and creates safety hazards. Address structural problems, roof leaks, and electrical issues before tackling cosmetic improvements.
Hire professionals for anything involving major electrical work, plumbing beyond simple fixture swaps, or structural changes. If you need to remove walls, run new wiring, or move plumbing lines, that’s beyond DIY scope. Many municipalities require permits and licensed contractors for these projects anyway.
One clear rule: If it’s structural, involves turning off main water or power lines you can’t safely access, or requires pulling permits, call a licensed professional. The small cost savings from DIY aren’t worth the risk of injury, code violations, or insurance headaches.
Quick summary + clear CTA (what to do next)
The fastest path to visible home value starts with three moves: fresh paint in neutral tones, updated lighting throughout your main living spaces, and matching hardware on cabinets and doors. These changes cost $300–$500 combined and take one long weekend to complete.
Start with a realistic budget—even $150 focused on one room beats $150 scattered across your whole house. Pick the space that bothers you most or that guests see first. Buy your supplies mid-week when stores are less crowded and staff can help you choose the right products.
Your next action: measure one room this weekend and commit to one upgrade. Take before photos so you can see the difference when you’re done. Most people underestimate how much impact small changes make until they compare the photos side by side. That visual proof usually motivates them to tackle the next room.
Make a shopping list today and schedule your project for the coming weekend. You’ll be surprised how much better your space feels with just a few focused improvements.