

A cramped kitchen doesn’t mean you’re stuck with cluttered counters and nowhere to chop vegetables. Thoughtful layout choices, smart storage systems, and compact appliances transform even the smallest kitchen into a functional workspace. You can brighten the room, add storage, and improve workflow without gutting walls or spending thousands. This guide offers three practical starter plans for common layouts—galley, L-shaped, and one-wall—plus a quick cost breakdown and step-by-step tasks you can tackle in stages. Whether you own your home or rent an apartment, you’ll find changes that fit your budget and timeline.
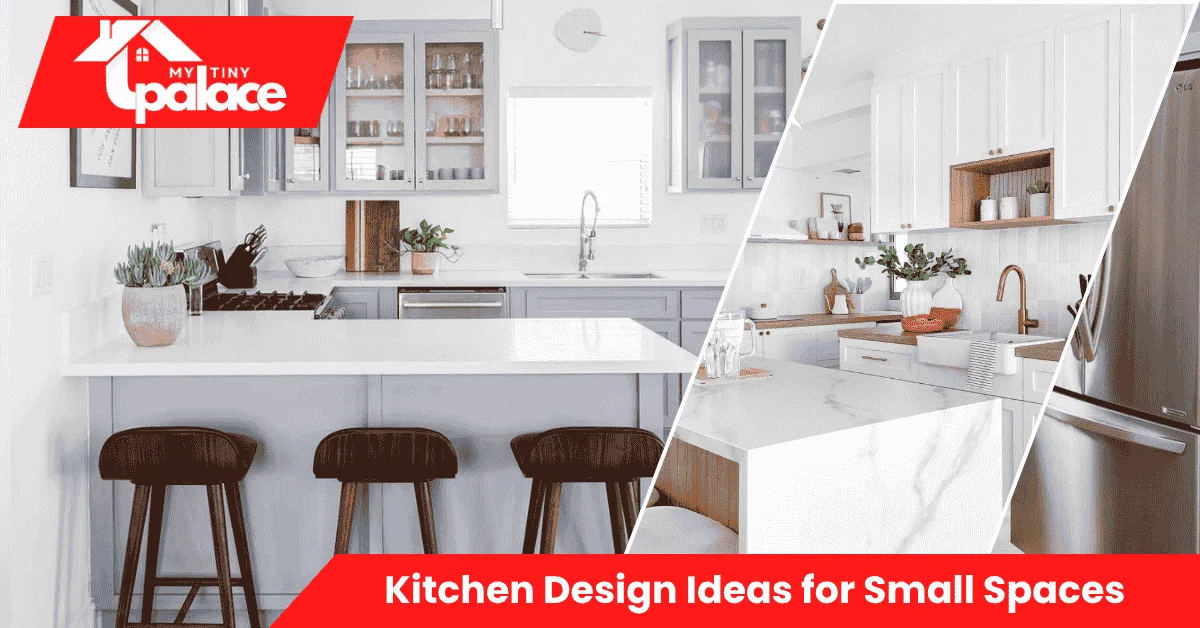
- Kitchen Design Ideas for Small Spaces
- Why Good Small-Kitchen Design Matters
- Core Solution: Space-Saving Storage Systems
- How to Choose Layout, Surfaces, and Appliances
- Step-by-Step: Redesign Your Small Kitchen
- Costs, Time, Tools — Include a Small Table
- Common Tradeoffs & Pros/Cons — Who Should Consider Which Idea
- Quick Summary + CTA (What to Do Next)
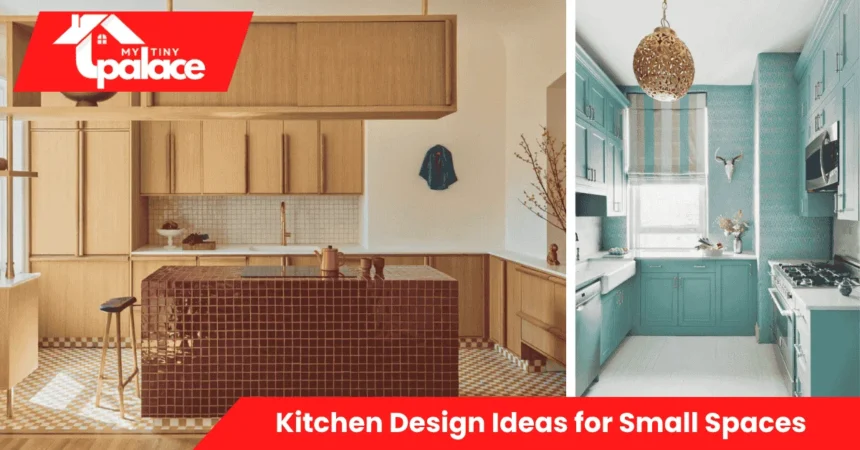
Kitchen Design Ideas for Small Spaces
Kitchen design ideas for small spaces focus on making every inch work harder. This includes choosing the right layout for your room’s shape, installing space-saving storage like pull-out pantries and vertical shelving, selecting compact appliances, and using light surfaces to create an open feel. “Small” means different things depending on your situation—a narrow galley kitchen with two facing walls, a micro-kitchen tucked into one corner, or a one-wall kitchenette common in studios. The goal is the same: to maximize function while keeping the space comfortable and visually open. You’ll implement changes in stages rather than all at once, starting with the upgrades that give the biggest return for your effort and budget.
Why Good Small-Kitchen Design Matters
A well-designed small kitchen saves time and reduces stress. When storage is organized and everything has a place, you spend less time hunting for tools and ingredients. Clear counters give you room to prep meals without constantly rearranging appliances. Good lighting and an efficient layout make cooking faster and more enjoyable, especially on busy weeknights.
Better design also increases your home’s comfort and value. If you own, smart upgrades like pull-out pantries and modern lighting make your property more attractive to future buyers. If you rent, temporary improvements like freestanding storage and removable fixtures make your daily routine smoother without violating lease terms. Many people worry that remodeling a small kitchen costs too much or disrupts life for weeks. The truth is, you can make targeted improvements in weekend projects, spending a few hundred dollars on high-impact changes like under-cabinet lighting or drawer organizers before committing to larger renovations.
Related Articles

A functional small kitchen reduces daily frustration. You won’t bump into open cabinets, struggle to reach items stored too high, or waste counter space on bulky appliances you rarely use. Each smart choice compounds—better lighting makes the room feel larger, which reduces stress, which makes you more likely to cook at home instead of ordering takeout.
Core Solution: Space-Saving Storage Systems
Small kitchens live or die by storage. If you can’t find what you need or everything spills out when you open a cabinet, the space doesn’t work, no matter how pretty it looks. Start with vertical storage—use the full height of your walls by installing cabinets or open shelving up to the ceiling. Store rarely used items like holiday dishes on top and keep everyday plates and glasses at eye level.
Pull-out pantries fit narrow gaps between appliances or at the end of a cabinet run. They slide out to reveal spices, cans, and bottles at a glance, eliminating the need to dig through deep shelves. Corner cabinets waste space unless you install lazy susans or pull-out corner drawers that bring items to you instead of forcing you to reach into dark corners.
Shallow drawers organized with dividers work better than deep cabinets for utensils, spices, and small tools. Deep drawers are great for pots and pans, but terrible for miscellaneous items that get buried and forgotten. Choose based on what you’re storing—flatware and knives go in shallow dividers, while stock pots and mixing bowls need deeper spaces.
Over-fridge cabinets add storage but require a step stool to reach. Use them for things you need once a month or less. Under-counter space is more valuable—consider built-in appliances like microwaves or dishwashers to free up counter space. The tradeoff: built-ins cost more upfront but look seamless, while freestanding units are cheaper and portable when you move.
How to Choose Layout, Surfaces, and Appliances
Your layout depends on your room’s shape and how you cook. Galley kitchens have two parallel walls with a walkway between them. They work well if you cook alone and need efficient movement between sink, stove, and fridge. Keep the walkway at least 36 inches wide so cabinet doors can open without blocking the path. If two people cook together, a galley can feel cramped during meal prep.
Related Articles

L-shaped layouts fit corners and offer more counter space than galleys. One leg holds the sink and prep area, while the other accommodates the stove and fridge. This layout creates a compact work triangle and leaves the center open for a small table or mobile cart. It suits people who cook often and want defined zones for different tasks.
One-wall kitchens line everything along a single wall, common in studios and small apartments. They’re the most space-efficient but offer the least counter and storage area. Prioritize vertical storage and use a narrow mobile island or cart for extra prep space. This layout works if you cook simple meals and don’t need multiple workstations.
Surface choices impact how large the room feels. Light countertops like white quartz or butcher block reflect more light and make the space appear bigger. Dark surfaces like black granite look dramatic but can feel heavy in tiny rooms. Pair light counters with a reflective backsplash—subway tile or glass tile bounces light and adds depth.
Compact appliances save precious space. Replace a full-size refrigerator with an under-counter model if you live alone or shop frequently. Choose a 24-inch dishwasher instead of the standard 30-inch version. Consider a combo oven-microwave unit to eliminate one appliance from your counter. The tradeoff: smaller appliances cost more per cubic foot of capacity and may not fit large families or people who batch-cook.
Step-by-Step: Redesign Your Small Kitchen
Start by planning your changes on paper. Measure your room’s dimensions and sketch the current layout. Mark where doors swing open and where you need clearance to move comfortably. Decide which upgrades matter most—storage, lighting, or surface improvements—and prioritize those.
Declutter before you buy anything. Empty cabinets and drawers, discard expired food and broken tools, and donate appliances you haven’t used in six months. This step reveals how much storage you actually need and prevents you from buying organizers for items you don’t keep.
Upgrade storage next. Install pull-out pantry units, add drawer dividers, and mount hooks inside cabinet doors for measuring cups and pot lids. These changes take a weekend and cost $100–$30,0, depending on how much you buy. You’ll see immediate improvement in how easily you find things.
Improve lighting after storage. Add under-cabinet LED strips to brighten counters and eliminate shadows while chopping. Swap out the overhead fixture for a brighter, more focused option. Good lighting makes the room feel larger and safer by reducing dark corners. This phase takes a few hours and costs $50–$150 for basic LED strips and a new fixture.
Finish with surface updates like a fresh coat of paint on walls or cabinets, a new backsplash, or contact paper to refresh countertops temporarily. These cosmetic changes take a weekend and range from $30 for paint to $300 for peel-and-stick tile.
Materials & Tools You’ll Need (Quick List)
You’ll need basic tools like a drill, screwdriver set, measuring tape, and level. Buy drawer organizers, adhesive hooks, under-cabinet LED strips, and paint or peel-and-stick materials for surfaces. If you’re installing new cabinets or appliances, budget for mounting hardware and possibly a helper for heavy lifting. Most small-space updates require no specialized tools beyond what’s in a basic home toolkit.
3 Starter Layouts With Quick Action Plans
Galley kitchen: Focus first on clear walkways—remove freestanding carts or storage that blocks the path. Install slim pull-out pantries on one wall to consolidate dry goods. Add task lighting under upper cabinets to brighten prep areas. This layout works for solo cooks who value efficiency over social space.
L-shaped micro-kitchen: Maximize corner storage with lazy susans or pull-out corner units. Install open upper shelves on one leg to display dishes and free up lower cabinets for heavier items. Use the short leg for a small appliance garage with a roll-up door to hide blenders and toasters. This setup suits couples or small families who cook frequently.
One-wall kitchenette (renters): Add a tall freestanding pantry at one end to store food and small appliances vertically. Mount magnetic knife strips and utensil rails on the wall to keep counters clear. Use a narrow mobile cart with locking wheels for extra prep space you can roll away when not cooking. This approach works for apartment dwellers who can’t make permanent changes.
Costs, Time, Tools — Include a Small Table
| Item | Typical Cost | Time to Install |
|---|---|---|
| Drawer organizers (set of 4) | $30–$60 | 30 minutes |
| Pull-out pantry unit | $80–$200 | 2 hours |
| Under-cabinet LED strips | $25–$80 | 1 hour |
| Peel-and-stick backsplash | $50–$150 | 3–4 hours |
| Compact dishwasher (24-inch) | $400–$800 | 4 hours (DIY) |
| Mobile island cart | $100–$300 | 15 minutes |
| Cabinet paint refresh | $40–$100 | Weekend |
Expect to spend $200–$600 for a basic small-space refresh focusing on storage and lighting. Larger projects involving new appliances or cabinet refacing run $1,000–$3,000. Time commitment varies: storage upgrades take a weekend, while full refits require two to three weeks if you’re doing most work yourself. Hiring professionals for electrical or plumbing work adds cost but ensures safety and code compliance.
Common Tradeoffs & Pros/Cons — Who Should Consider Which Idea
Open shelving vs. closed cabinets: Open shelves make small kitchens feel airy and keep dishes within easy reach. They work well if you own matching dishware and keep shelves tidy. Closed cabinets hide clutter and protect contents from dust, but can make rooms feel boxed in. Choose open shelving if you’re organized and want a modern look. Stick with cabinets if you store mismatched items or cook with lots of spices and oils that create a mess.
Built-in vs. freestanding storage: Built-in pantries and appliances look seamless and maximize every inch. They’re ideal for homeowners planning to stay long-term. Freestanding units cost less, work for renters, and move with you. Pick built-ins if you own and want a polished finish. Choose freestanding if you rent or move frequently.
DIY vs. professional work: DIY saves money and lets you work at your own pace. It suits projects like painting, installing organizers, and mounting shelves. Hire professionals for anything involving electrical wiring, gas lines, or structural changes like removing walls. The tradeoff: DIY takes longer and requires learning new skills, but pros charge $50–$100 per hour for labor.
Choose based on your cooking habits and lease terms. If you cook elaborate meals daily, invest in better workflow and appliances. If you make simple dinners, prioritize storage and lighting over high-end surfaces. Renters should focus on removable upgrades like carts, adhesive hooks, and freestanding pantries. Homeowners can commit to built-ins and permanent fixtures that add resale value.
Quick Summary + CTA (What to Do Next)
Small kitchen design ideas for small spaces revolve around smart storage, efficient layouts, and lighting that opens up the room. Pick one of the three starter plans—galley, L-shaped, or one-wall—and tackle the first week’s tasks this weekend. Start with decluttering and measuring, then add one storage upgrade like a pull-out pantry or drawer organizers. Check the costs and tools table to budget your project and buy only what you need for phase one. Most changes take a few hours and cost under $100, so you can test ideas before committing to bigger renovations. Try one small change this weekend—mount an LED strip under your cabinets or install a magnetic knife rail—and see how much easier your kitchen feels.