


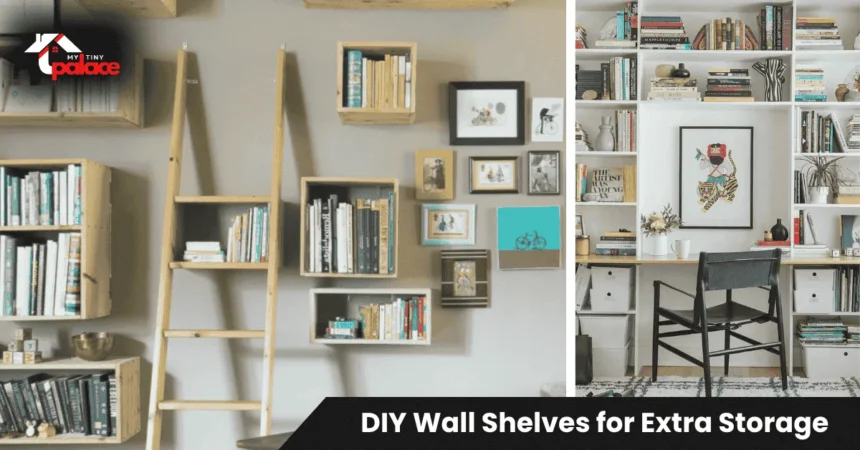
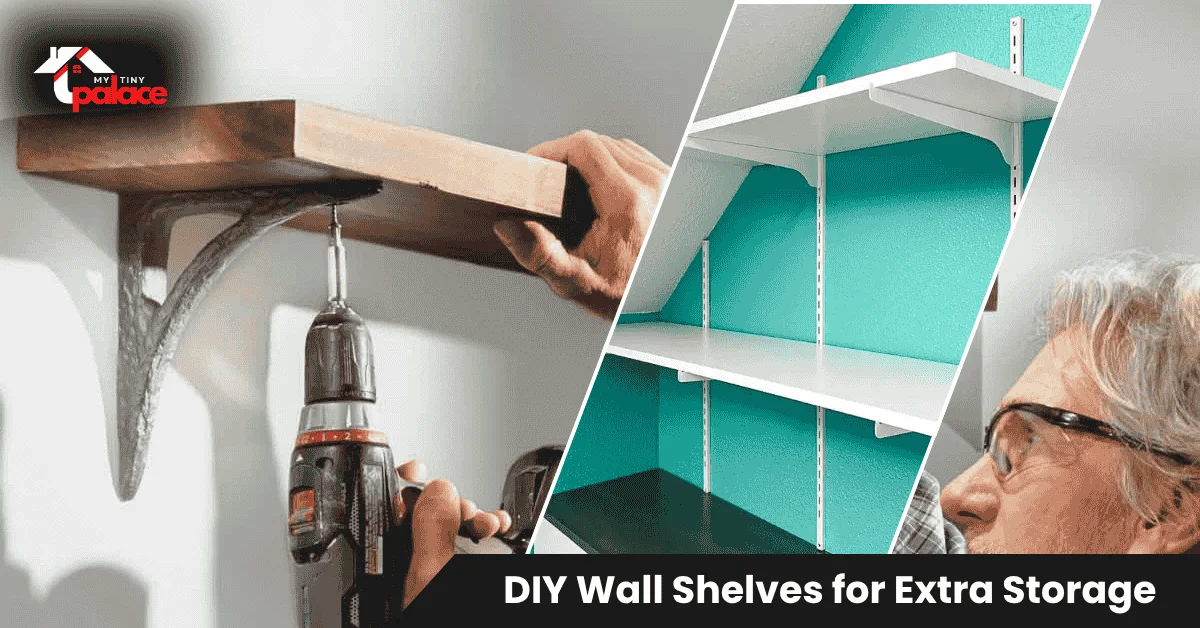
DIY Wall Shelves for Extra Storage
Quick summary
DIY wall shelves, clear floor space, and organize your home without major renovations. You’ll learn how to build simple shelves in one evening, choose the right materials and anchors, and create renter-friendly storage that fits any budget.
- Quick summary
- DIY Wall Shelves for Extra Storage
- Why wall shelves matter in small & busy homes
- Types of wall shelves and space-saving solutions
- How to choose the right design and materials
- Step-by-step: measure, build, and install
- Materials, tools, costs (include a small table)
- Weight, placement, and safety tips
- Pros & cons — who should consider building them
- Quick summary + CTA (what to do next)
DIY Wall Shelves for Extra Storage
Building wall shelves gives you vertical storage without sacrificing floor space. The project suits beginners because you need just a few tools, basic materials, and a couple e hours. You can start with a single floating shelf above your desk or add multiple bracketed shelves in a closet. If you’re new to home projects, check out our guide on DIY Home Projects for Beginners for more starter-friendly ideas.
Most DIY wall shelves fall into a few simple categories: floating shelves with hidden brackets, visible L-bracket shelves, corner units, and ladder-style designs. Each type solves different storage needs. A beginner can install a basic bracket shelf in one evening or tackle a floating shelf over a weekend once you understand the steps.
“A single shelf frees floor space and clears your surfaces.”
The appeal goes beyond function. Custom shelves fit odd spaces that store-bought units can’t match. You control the exact width, depth, and finish. Whether you need narrow shelves for a tight hallway or deep ones for kitchen supplies, building them yourself means perfect dimensions every time.

You don’t need advanced carpentry skills. If you can measure, mark level lines, and drill straight holes, you can build sturdy wall shelves. The key is understanding which anchors work for your wall type and how much weight your design will hold.
Why wall shelves matter in small & busy homes
Floor space disappears fast in apartments and small houses. Every bookcase, storage bin, and side table shrinks your usable area. Wall shelves solve this by moving storage upward, where space sits unused.

The practical wins are immediate. You gain storage without blocking walkways. Items stay visible and within reach instead of being buried in boxes. Vertical shelving makes a 10×12 room feel larger because sightlines stay open across the floor.
Clearing surfaces also cuts daily stress. When counters and tables stay empty, cleaning takes minutes instead of moving piles around. You spend less time hunting for items because everything has a designated spot at eye level.
Imagine a cramped home office. Your desk holds a laptop, papers, a coffee mug, and random supplies—all competing for space. Add two 36-inch shelves above the desk. Books, files, and supplies move up. Your work surface clears instantly, and the room feels organized without buying furniture.
The emotional benefit matters too. Clutter triggers mental fatigue. A tidy, well-organized space helps you focus and relax. Wall shelves create that calm by giving every item a home.
Related Articles

Small changes deliver big impact. One shelf in a bathroom holds toiletries that used to crowd the counter. A kitchen shelf stores spices previously stuffed in a drawer. These micro-improvements compound across your home.
Types of wall shelves and space-saving solutions
Five main shelf styles handle different needs and skill levels.
Floating shelves hide brackets inside the shelf body for a clean look. They work best for light to medium loads—books, plants, decor—and suit modern spaces. Installation takes more precision because brackets must align perfectly.
Bracketed shelves use visible L-brackets or triangular supports. They hold more weight than floating styles and install faster. The brackets show, but you can paint them to match the walls or choose decorative metal finishes.
Corner shelves fit into unused 90-degree angles. They’re ideal for small bathrooms or tight kitchens where standard shelves won’t fit. Most use simple triangular boards with two-point mounting.
Ladder-style shelves lean against walls without mounting. They suit renters because they leave no holes. Weight capacity is lower, but they’re portable and adjust easily.
Cube shelves create boxed storage units. They work well stacked or arranged in patterns. Building them requires more cuts but offers closed storage for hiding clutter.
Each type shines in specific situations. Use floating shelves in living rooms for display. Choose bracketed shelves in garages and pantries where function beats aesthetics. Corner shelves maximize awkward spaces. Ladder styles work for temporary setups or rental restrictions.
How to choose the right design and materials
Start by asking three questions: What will you store? What’s your wall type? What’s your budget?
Load needs determine everything else. Books weigh roughly 30 pounds per linear foot. Decor and plants are lighter—maybe 10–15 pounds per foot. Heavy kitchen items or tools can weigh 40+ pounds. Knowing your load guides bracket choice and shelf thickness.
Wall type affects anchor selection. Drywall needs toggle bolts or molly anchors unless you can screw into studs. Plaster walls require specialized anchors. Concrete and brick take masonry screws. Check your wall before shopping so you buy the right hardware.
Budget splits into three tiers. Low-cost builds use pine boards and basic brackets—expect $15–$30 per shelf. Medium builds add hardwood or pre-finished boards with better brackets—$40–$80 per shelf. Investment builds feature thick hardwood, custom cuts, and premium finishes—$100+ per shelf.
Material choices balance cost and durability. Pine boards are cheap and easy to cut, but dent easily. Plywood looks plain but holds screws well and stays flat. Solid oak or birch costs more but lasts decades and looks professional. MDF is affordable and smooth, but can’t hold heavy loads or get wet.
For floating shelves, you need hollow-core shelves with internal brackets or solid wood thick enough to hide mounting hardware. For bracketed shelves, any 3/4-inch or 1-inch board works. Depth matters too—10–12 inches suits most uses, while 6–8 inches works for shallow storage.
Bracket mechanics vary by style. L-brackets mount to studs or anchors and support the shelf from below. Floating shelf brackets are steel rods that insert into the wall and slide into the shelf. Choose the system that matches your skill level and aesthetic preference.
Quick selection rules: Use solid wood for visible shelves in main rooms. Use plywood or MDF for utility areas like closets and garages. Pick brackets rated 50+ pounds per pair for book storage. Opt for renter-friendly rail systems or adhesive mounts if you can’t drill holes.
Step-by-step: measure, build, and install
You can install a simple shelf in one evening or take a weekend for a more involved build. Both approaches work—choose based on your timeline and confidence.
One-evening mini plan — measure, buy, and install a single shelf
Start by measuring your wall space. Mark where you want the shelf and measure the exact length. Add the height you want it mounted—typically 60–72 inches for living areas, lower for closets.
Buy a pre-cut board in your measured length or have the hardware store cut it for you. Grab two L-brackets rated for your expected load and a box of appropriate wall anchors. Pick up a small level if you don’t own one.
At home, hold the shelf against the wall at your marked height. Use the level to draw a straight line. Mark where the studs are located with a stud finder. If no studs align with your brackets, mark spots for anchors instead.
Drill pilot holes, install anchors if needed, then screw brackets into place. Set the shelf on top and secure it to the brackets with short screws from below. Test by pressing down gently—the shelf shouldn’t wobble.
Full step list — measure, cut, sand, mount anchors/brackets, level, finish
For a more complete build, start by measuring and planning shelf placement. Sketch your layout with exact dimensions. Buy boards slightly longer than needed so you can trim to the perfect size.
Cut boards to length using a handsaw or ask the store to make cuts. Sand all edges smooth with 120-grit sandpaper to prevent splinters. Wipe dust away with a damp cloth.
Apply the finish before mounting. Use stain, paint, or clear coat—two thin coats work better than one thick coat. Let dry completely, usually 4–24 hours depending on the product.
Mark your shelf height on the wall with a level. Use a stud finder to locate studs. If studs align with your bracket positions, drill directly into them. If not, mark anchor locations instead.
Install anchors by drilling appropriately sized holes, then tapping or screwing anchors into place. Attach brackets to anchors or studs. Double-check the level before tightening fully.
Place the shelf on brackets and secure it from below. For floating shelves, drill holes into the shelf back that align with the wall-mounted bracket rods, then slide the shelf onto the rods.
Renter-safe alternatives: Use damage-free mounting strips rated for your shelf weight, install rail systems that attach with minimal holes, or choose freestanding ladder shelves. If you must drill, fill holes with spackle when you move out—it’s a simple five-minute fix.
If you’re mounting shelves near electrical outlets or running any wiring, consult a licensed electrician to ensure safe installation.
Materials, tools, costs (include a small table)
Budget and timeline vary based on complexity and materials. Here’s what to expect:
| Level | Materials Cost | Time Needed | Tools/Skills Required |
|---|---|---|---|
| Low | $15–$30 per shelf | 1–2 hours | Basic (pre-cut board, brackets, anchors, drill, level) |
| Medium | $40–$80 per shelf | 3–5 hours | Some cutting (handsaw or store cuts, sanding, finishing) |
| Investment | $100–$150 per shelf | 6–10 hours | Advanced (table saw, router, custom brackets, professional finish) |
Most beginners start low and build confidence before tackling complex projects. Save money by using pre-cut boards and standard brackets. Invest in quality brackets and anchors—they’re the structural backbone and prevent shelf collapse.
Where to buy: Hardware stores carry brackets and anchors. Lumber yards offer better wood selection and free cuts. Big-box retailers like Home Depot stock everything you need in one trip. Online retailers work if you know the exact dimensions.
Essential tools include a drill, level, stud finder, tape measure, pencil, and appropriate drill bits. Optional tools that speed work: a handsaw for custom cuts, sandpaper or a sander for smooth edges, paintbrush for finishing.
Weight, placement, and safety tips
Load capacity depends on three factors: shelf thickness, bracket strength, and anchor type. A 3/4-inch pine board on two L-brackets can hold 40–50 pounds if mounted to studs. Drop that to 20–30 pounds with hollow-wall anchors.
Anchor selection by wall type: Use wood screws directly into studs for maximum strength. In drywall between studs, use toggle bolts for loads over 30 pounds or plastic anchors for lighter items. Plaster walls need specialized anchors that expand behind the lath. Concrete requires masonry screws or expansion anchors.
Proper spacing matters. Place brackets 16–24 inches apart for most shelves. Longer shelves need three brackets to prevent sagging. Keep shelves 24–30 inches apart vertically so items fit comfortably between levels.
Load testing prevents disasters. After installing, gradually add weight. Start with a few books or light items. Wait an hour, check for sagging or bracket movement. Add more weight slowly over a day or two until you reach your target load.
When to call a pro: If you’re unsure about wall structure, mounting into tile or stone, or dealing with very heavy loads (80+ pounds), hire a handyman or contractor. They can assess your wall and ensure safe installation. Incorrect mounting can damage walls or cause shelves to fall, creating injury risk.
Label your studs with painter’s tape before starting. Double-check the level at every step—even slight angles become obvious once shelves are loaded. Measure twice before drilling to avoid extra holes.
Pros & cons — who should consider building them
Ideal for: Budget-conscious DIYers who want custom storage now. Small apartments and homes benefit most because vertical space is underused. Renters with landlord permission can install temporary or low-damage systems. People who enjoy hands-on projects and want to learn basic carpentry.
Less ideal for: Renters without permission to drill—though no-drill options exist, they’re more limited. Homes with very old plaster or unusual wall materials may need professional assessment. Very heavy storage needs (tools, machinery, full book collections) might require built-in cabinets instead of simple shelves.
The biggest advantage is customization. You get exactly the size, finish, and placement you want. Store-bought shelves rarely fit odd spaces or match your exact color scheme. DIY costs less, too—a custom shelf might cost $25 in materials versus $60–$100 for a similar pre-made unit. Plus, adding functional storage is one of the Low-Cost DIY Upgrades That Add Value to Your Home that future buyers appreciate.
The challenge is time and skill. Your first shelf takes longer as you learn. Mistakes happen—wrong measurements, crooked lines, stripped screws. But these are fixable, and skills improve with each project.
Best spaces for DIY shelves: home offices (for books and supplies), kitchens (spice racks, dish storage), bathrooms (toiletries), closets (shoes, folded clothes), garages (tools, paint cans), and living rooms (display shelves).
Quick summary + CTA (what to do next)
Start by decluttering the space where you want shelves. Measure your wall carefully and decide on one simple shelf as your first project. Pick a bracketed design if you’re nervous—they’re more forgiving than floating shelves.
Make your shopping list: board size, bracket type, anchor size, and finish. Most hardware stores cut boards for free if you buy from them. That eliminates the need for a saw and ensures straight cuts.
Try the one-evening plan first. Install a single shelf in a low-risk area like a closet or home office. Once you see how simple it is, you’ll feel confident tackling more visible spaces.
Measure twice and mark your studs before you drill. Choose toggle bolts for hollow walls and heavy loads. Testthe weight gradually after installation. Those three rules prevent most DIY shelf failures.
Pin a design you like for inspiration, grab your tools, and start this weekend. One shelf takes two hours and transforms how you use your space.